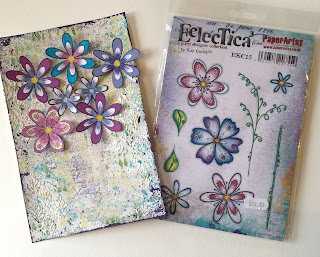
The two stamp sets Ive used are: EKC15 and EK19. These flower heads are great images to use on the 2.5" diameter Coins. If you haven't yet caught the 'bug' for making these little mini art pieces, then I hope you can find inspiration and know-how on the PA blog. Each contributing artist has a different 'take' on how to create these while using various stamped images from different designers. The technique is pretty much the same as making regular ATCs. My technique is the way I produce any piece of art journaling - lots of layers!
These backgrounds were created by first laying down a mix of Distress Oxides, adding various colours until I was happy with the result. These three sheets are a result of using different combinations. The technique was Tim Holtz's swooshing method. Once dry, I then added PaperArtsy Infusions on top, attempting to use similar colours to the Oxides. These are not permanent backgrounds so needed fixing with Ranger's Distress glaze before adding further layers.
They look so pretty even before I add any stencilling or stamping on top.
Here are just a few I added further layers to. This included stamping: I used some PaperArtsy mini stamps and some stamps designed by Michelle Ward for GreenPepperStudios. I'm not sure these are still available as I bought them several years ago. I also added some marks using bottle caps/tops and a white Sharpie paint pen. These were now ready for the focal images to be placed on top.
You can see which stamp sets I used over on the PA blog. I used a mix of Derwent Inktense blocks (grated then mixed with water to create a watercolour mix) and Copic markers, to colour in the flowers, butterflies and dragonflies. I also added some glitter to some of the images and some text.
Now, I turned my attention to creating some storage tins to keep these Coins in! I had seen an idea on Pinterest to turn a large Pringles tin into an ATCoin storage container. I preferred to use the smaller size.
This seemed a more manageable size. I had great fun creating a masterboard to cut these panels from. This time I used Paperartsy Fresco chalk paints and a couple of Paperartsy stencils.
I used Paperartsy grunge paste, pushed through this scrummy stencil (PSO34) before brayering some Paperartsy Fresco chalk paints across the 12" Smoothy card I used for this. I created several sheets and used several colours of Frescos.
The raised pattern resisted the paint and left lots of white space, which I really liked. Once I had created a layer of colour, I added further stencilling on top, using one of Kay Carley's new stencils, and mixing grunge paste with the Infusions. I explained on the PA blog my surprise at the results but I was pleased with the colours this technique produced.
This is such a pretty stencil. I love the panels I created to wrap around the tins. I only needed to paint a base coat of black paint and create a larger Coin for the lid. I was very happy to have enough left over to create some matching Coins. So, there we are. I do hope you like my ATCoins and want to get involved in this new swapping craze. These are all up for swaps if you're interested. Just leave me a comment below. I will leave you with a couple of close-up photos of the Coins. Until next time...


