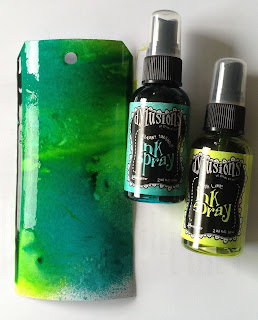
Supplies needed are: tags -a good weight as this technique used a lot of water, preferably watercolour or mixed media; ink sprays - I'm using Dylusions Ink sprays, just ensure they are waterbased. You can try different inks though to explore different outcomes; water spray bottle or mister; variety of stencils; kitchen roll.
Start by spraying your tag with water. Then spray a puddle of ink in a couple of places on the tag. Repeat with another colour. Then lightly mist water across the tag to gently blend the two colours.
Immediately place a second tag on top of the wet tag and press down firmly to transfer the excess ink. Peel apart and blot both with kitchen roll.
Select a stencil of your choice and lay this across the top of the two tags and spray through the stencil with water. Try to make sure that the stencil is lying flat to avoid water creeping underneath. This is all a bit trial and error really. You will have varying results depending on the stencil you use and how much water you spray! Just play around until you are happy with your results.
Next, lift the stencil and immediately flip it over onto the bottom half of your tags. Press down firmly and remove. I found more success if i dabbed the flipped stencil with kitchen roll before I removed it.
You now need to blot the entire surfaces with the kitchen roll. Can you see the 'ghost' effect where the water has removed the ink? It creates such a pretty background doesn't it? However, these inks are not permanent so they will need sealing at some point. Tomorrow I will make some suggestions as to how you can build further layers from this first layer. Meanwhile here are some other colours I played with.
I hope you have as much fun as I have had if you decide to join in with this weeks challenge. Happy crafting until next time!


Oooh like the look of these
ReplyDelete