This month's Goodie box, as always, is full to the brim with luscious, top quality products. Julie has spoiled us with an abundance of gorgeous flowers. These include: mulberry, crochet, fabric, glass, resin, metal and 3D flowers. And that's just the flowers. Add to that a variety of paper, mulberry and metal leaves, crystal beads, assorted stamens...it just goes on and on!
Here I have just selected a few of the box contents to use on my project. I was lucky enough to be crafting on some lovely hot days, so transferred everything into the garden.
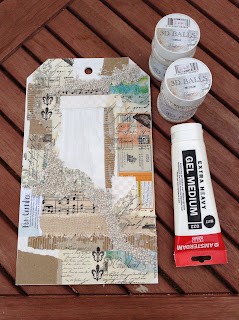
Started with a layer of gesso. Once this was dry I sorted some items from my junk stash to create a collaged background. This would provide an interesting textured foundation layer.
I love this stage. I find it so relaxing just ripping papers and sticking them down, hoping I won't go too mad with subsequent layers and some of the text and colours will still be glimpsed in the final layer. Doesn't always happen as I'm pretty heavy handed with paints and inks!
Once I was happy with my glued down collage pieces, I added some 3D balls. I had already decided on my main focal image so I had a rough idea where I wanted these little balls to be placed. I then added a watery gesso layer over the whole spread.
Now, not only is the box beautifully wrapped in a complementary piece of tissue but so are the contents inside! This month's tissue is so pretty that I think all the design team this month has used the tissue on their projects! This was my next layer. I had hoped the colours would 'bleed' into the gesso but it's too high quality for that!
Isn't it pretty? I have also prepared the Papermache wall hanging in a similar way for my second project that I will post pictures of over the weekend. Now for some paint!
Unusually, I opted for Prima Colour Blooms rather than paint on this occasion as I wanted to spray colour in various places to complement the colours in the tissue paper and ensure the little porcelain balls were covered in colour. These are quite subtle colours and quite shimmery, so I also added a stronger Dylusions pink to the mix. Delicious. Once I was happy with the colour, I dried it with a heat gun. Now, a word of warning here if you haven't used Colour Blooms before. Even when dried they tend to remain quite sticky. As I found in my art journal! However, a good remedy is to cover the whole surface in talcum powder then gently brush it all off. You do lose some of the shimmer but that's better than your pages sticking together!
Finally, I got to play with this month's 'goodies'. Such fun. Most of what you can see is from this month's box but I couldn't resist adding some bits from last month's too. . I did add some of last month's pink shimmer spray over the metal flowers. A trick I learned from the fabulous Anna Dabrowska.
That's the great thing about subscribing. You get to mash up and mix all your products. For more about subscribing go here. I do hope you have been inspired by this project to go and look at Julie's website. The products are so gorgeous and the price is really good!
Until next time!


